Interior Architecture and Environmental Design (DRAFTING CONVENTIONS)
CAD BLOCKS
DRAFTING CONVENTIONS
İntroduction
LINE WEIGHT & LINE TYPES
- Line weights and line types help to create an easy understanding of the document and add visual interest to the document.
LINE WEIGHT
- It is the light or darkness and width of the line.
- There are 3 line weights: light , medium & dark
BORDER LINES (2B to 4B or 7mm to 9mm pencil/mechanical pen)
- Create margins on sheet or create lines around the title block
- Dark and about twice as thick as bold lines
GUIDELINES & CONSTRUCTION LINES (4H to 6H pencil or 3mm mechanical pencil)
- Temporary and used to layout the page and to create the initial shapes
BOLD LINES (soft B to 2B pencil or 5mm or 7mm mechanical pen)
- Primary objects / dark and have a thick width
- Walls in plan + outline around the perimeter of the elevation + 3D objects
MEDIUM LINES (HB pencil or 5mm mechanical pen)
- Secondary objects such as doors, furnishings, counters and cabinets
- Elevation + 3D + information inside the objects
LIGHT LINES (H to 2H pencil or 3mm to 5mm mechanical pen)
- Action lines → Door swing in plan, hinge direction in elevation, etc.
- Information lines → Dimension lines, center lines, leader lines, section lines
- Fill patterns → Material information
LİNE TYPES
Visible objects in plan, elevation and 3D views / leader and dimension lines
Hidden objects or edges – hidden part of the objects + objects below or behind another object + shelving or cabinet above counter (!!! Should be in contact at the corners and when perpendicular to another line)
Alternate position of an object that can be moved (swing door, space needed for drawer and cabinet, door openings, sliding door opening direction, hinge points for the doors and Windows in elevation)
Connect notes or references to objects / starts as solid line and ends in arrow
When the extents of a drawing cannot fit on the paper / when you only need to Show a portion of a design
Center of a plan, object, circle, arc or any symmetrical object
SYMBOLS

- Section Symbol

- Elevation Symbol

- Detailing Symbol

- Levelling Indicator in Plan & Section-Elevation

- Window & Door Symbol in Plan
Pay Attention!!
!!! The height and width of the doors and windows should be written in centimeters.
!!! The doors and windows with same height and width should be identified with same numbers. (ex: D1, W1)
LETTERING
- All letterings should be in capital!
- Important properties of the letterings: o Height
-Letters should be between 2 horizon lines and there ahould be a line space in between!
Style
Spacing between letters
HATCH

- Common Used Material Symbols in Section / Plan
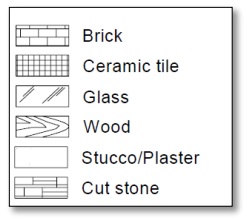
ARCHITECTURAL GRAPHIC SYMBOLS

HIERARCHY OF DIMENSION
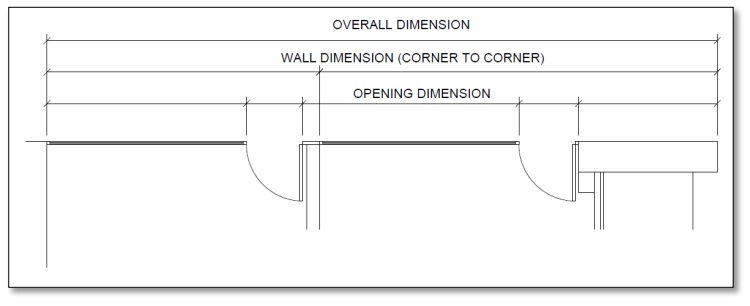
DRAWING CONVENTIONS: PLAN DRAWING
Plan Example
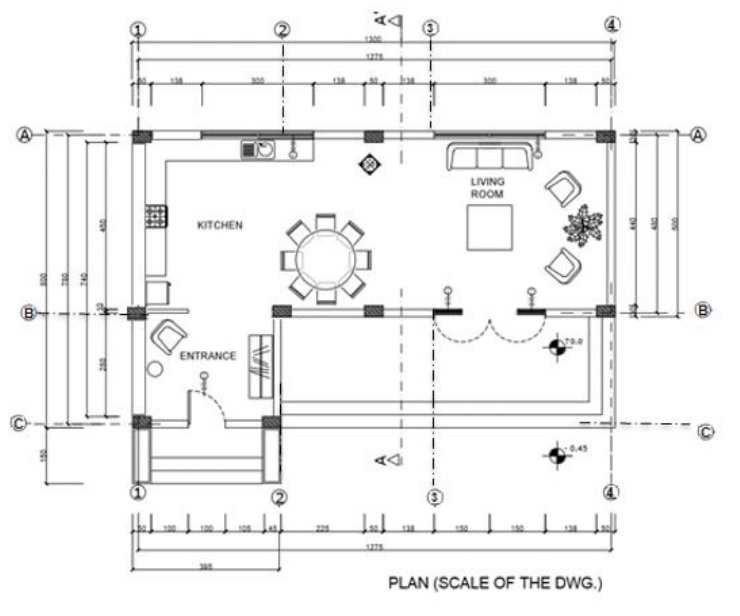
Drawing Plans: Checklist
- Indicate plan name.
- Indicate name of various spaces (e.g. kitchen, bath, dining etc.)
- Draw windows with reference numbers and dimensions. (See Section 10)
- Draw doors with reference numbers and dimensions. (See Section 9)
- Draw axes with centerlines.
- Draw section line with dash dot line, indicate section name. (See Section 3)
- Indicate scale of the drawing. (Fig.2.1.)
- Draw north indicator.
- Draw level indicator.
- Give interior and exterior dimensions.
- Hatch special floor surfaces, walls and columns in relation to the scale.
- Show any hidden objects with dashed lines. (See Section 1 for linetypes)
- Show any objects above eyelevel by dotted lines. (See Section 1 for linetypes)
- Draw furniture.
- Indicate call-out references to details on other sheets.
- Draw stairs/ramps/escalators/elevators and elevators (See Sections 7&8)
Pay Attention!!
!!! To the hierarchy of dimensions. (See Section 1)
!!! To linetypes (See Section 1)
!!! To hatches. Each material has a different hatch. (See Section 1)
!!! To the direction of door swing. Draw it with movement-light line.
!!! To create layers for different characteristic while using digital media.
!!! To text style. (See Section 1)
!!! To dimension styles. (See Section 1)
!!! To define drawing unit while using digital media.
!!! To draw a human figure for scaling.
Bath Part of a Plan Example

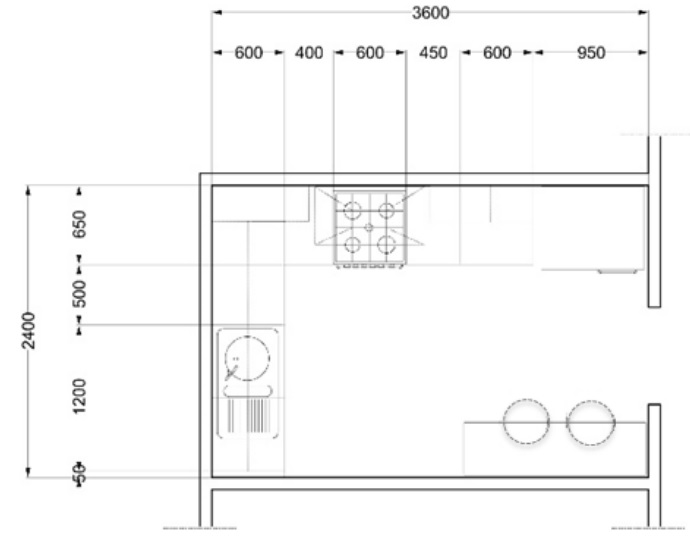
Kitchen Part of a Plan Example
DRAWING CONVENTIONS: SECTION DRAWING
Drawing Sections: Checklist
- Indicate section name.
- Draw ground line with thick line. (Fig.3.1.)
- Indicate space names. (Fig.3.1.)
- Draw level indicators. (Fig.3.1.)
- Draw furniture which are on interior elevation.
- Hatch structural systems, special surfaces, in relation to the scale.
- Draw axes with centerlines.
- Draw doors with labels and reference numbers. (See Section 9)
- Draw windows with labels and reference numbers. (See Section 10)
- Indicate material names with material labels.
- Indicate scale of the drawing.
- Indicate call-out references to details on other sheets.
- Show any hidden objects with dashed lines.
Pay attention!!
!!! To the hierarchy of dimensions. (See Section 1)
!!! To section cut hatches. They are different from interior elevation hatches.
!!! To hatches. Each material has a different hatch. (See Section 1)
!!! To floor level indicator, always give them in relation to level 0.00 (Fig.3.1.)
!!! To other level indicators, always give them in relation to openings and built-in furniture.
!!! To line types (See Section 1)
!!! To line thicknesses depending on which enters section and which don’t. (See Section 1)
!!! To draw a human figure for scaling.
!!! To the direction of opening in windows and doors.
Section Example

DRAWING CONVENTIONS: INTERIOR ELEVATION
Drawing Interior Elevation: Checklist
- Indicate interior elevation name.
- Draw ground line with thick line. (See Fig.4.1.)
- Draw level indicators. (See Fig.4.1.)
- Draw furniture. (See Fig.4.1.)
- Draw doors with labels.
- Draw windows with labels.
- Give dimensions at the bottom of drawing. (See Fig.4.1.)
- Hatch special surfaces, in relation to the scale. (See Fig.4.1.)
- Indicate material names with material labels. (See Fig.4.1.)
Pay attention!!
!!! To floor level indicator, always give them in relation to level 0.00
!!! To other level indicators, always give them in relation to openings and built-in furniture.
!!! To the hierarchy of dimensions. (See Section 1)
!!! To hatches. Each material has a different hatch. (See Section 1)
!!! To line types (See Section 1)
!!! To line thicknesses depending on which enters section and which don’t. (See Section 1)
!!! To draw a human figure for scaling.
!!! To the direction of opening in windows and doors.
Interior Elevation Example

DRAWING CONVENTIONS: (EXTERIOR) ELEVATION
Drawing Elevation: Checklist
- Indicate exterior elevation name.
- Draw ground line with thick line. (Fig.5.1.)
- Draw level indicators. (Fig.5.1.)
- Draw doors with labels. (See Section 9)
- Draw windows with labels. (See Section 10)
- Hatch special surfaces, in relation to the scale.
- Indicate material names with material labels.
Pay attention!!
!!! To level indicators, always give them in relation to openings and other structural elements such as roofs or canopies.
!!! To line types (See Section 1)
!!! To line thicknesses depending on which enters section and which don’t. (See Section 1)
!!! To draw a human figure for scaling.
!!! To the direction of opening in windows and doors.
Elevation Example
DRAWING CONVENTIONS: REFLECTED CEILING PLAN
Drawing Reflected Ceiling Plans: Checklist
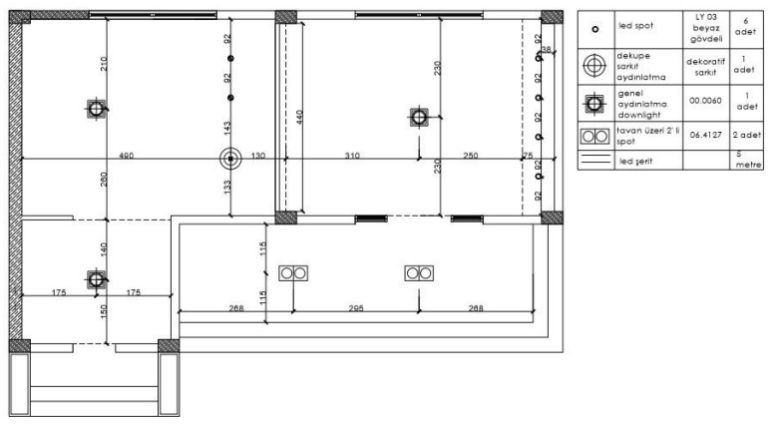
A reflected ceiling plan (RCP) is a drawing, which shows the items that are located on the ceiling of a space. It is a mirror view of the floor plan. When you look up the ceiling, lighting and the other items will be seen.
- Don’t forget to write reflected ceiling name.
- Dimensions and Centerlines can be shown.
- Show lighting locations and type of fixtures. (Fig.6.2)
- Show the ceiling height changes if exists.
- Specify the ceiling material (paint, stucco, etc.).
- Explain the symbols on the RCP.
- Don’t forget to show special ceiling items such as; switches, speakers from a stereo, emergency lighting, exit signs, security camera or domes, smoke or fire alarm devices, HVAC system, exhaust fans, expansion joint information or details.
Symbol Examples for RCP

Electrical Plan Example
An electrical plan shows the electrical elements of the ceiling.
STAIRS
DRAWING A HALF TURN STAIR PLAN
- Number of the risers is found b by dividing the total rise to the height of the risers (risers cannot be more than 16 cm height)
- Twice the rise and one tread (2R+T) should be between 60 to 63 cm. (tread should not be less than 28 cm).
- By paying attention to the width of stairs which should not be less than 120 cm and to the width of apron which should not be less than 20 cm, flights and apron are drawn.
- Risers are drawn. There should be maximum 16 risers in one flight.
- To show nosing a dashed line was driven 4cm behind the treads. Line of flight is drawn by an open circle in the first riser and an arrow showing the flight direction of the stairs which is crossing through the mid points of stairs.
- Handrails are drawn.
- Section of stair above eye level is indicated by trapezoid line and section that remains above the eye level is indicated by dashed lines.
- Number of stairs are written according to the flight direction of stairs.
- Landing and ground levels are shown.
- Dimensions of landing, flights and treads are given.
DRAWING A SPIRAL STAIR PLAN: (ground level)

DRAWING A SPIRAL STAIR PLAN ground level

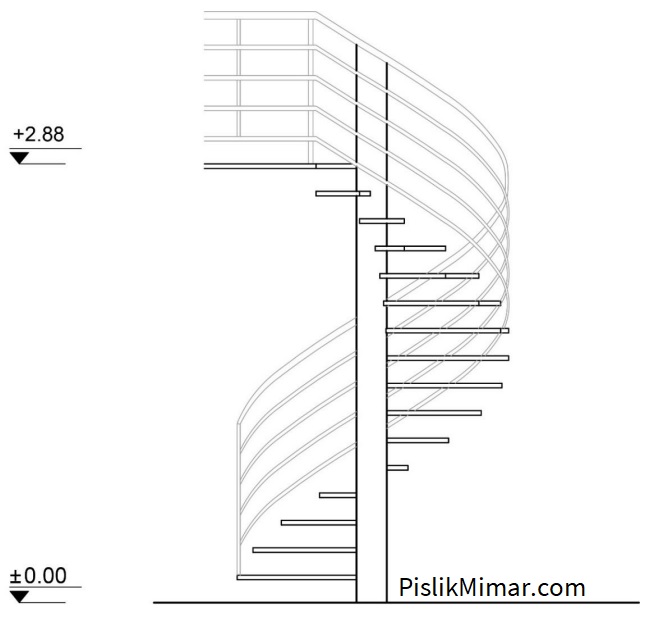
DRAWING A SPIRAL STAIR ELEVATION
DRAWING A HALF TURN STAIR SECTION
- Section line is drawn on stair plan that cut across the stairs.
- Stair plan is used as a guide while drawing section. Width of stairs and landings are determined by checking from the plan.
- Top point of the landing is determined by:
- No. of Risers X Riser Height
- Floor height is given.
- Slab thicknesses are given according to the material of the slab.
- From the beginning point of the first riser to the opposite direction a point was indicated with a clearance of tread. This point and the corner of landing is connected to determine the thickness of the stair slab.
- Threads are drawn.
- Same stages are repeated for the other flight. One flight should be in section view while the other is on the elevation view.
- Flooring materials are shown with hatching according to its material.
- Handrail and balustrades are drawn at minimum 90 cm height.
- Landing and floor levels are given.
STAIR SECTION

RAMPS
DRAWING A RAMP PLAN
- Maximum length of the ramp is determined with the consideration of ramp standards.
- The steepness of ramps which are longer than 10 meters should not exceed the %6 limit.

Ramp width is determined with considering the width should be minimum 90cm.
- Landings were drawn if needed
- (Ramps which are longer than 10 m. and which has higher steepness than 50 cm should have at least 250 cm landing)
- Line of flight can be shown in two different ways:
- 1st Way: As if drawing a stair: line of flight is drawn by an open circle in the first riser and an arrow showing the flight direction of the stairs which is crossing through the mid points of stairs. 2nd Way: Two inclined lines are drawn from the ramps’ two bottom corners, these lines are intersected in the middle point of the landing ine.
- If a ramp is steeper than 15 cm, balustrade should be drawn in both sides of the ramp. The height of the balustrade is 76-86 cm. Balustrades should be placed 30 cm in front of the starting point of the ramps.
- Landing and floor levels and steepness levels, as well as the dimension of the ramps are given.
DRAWING A RAMP SECTION
- Section line is drawn on ramp plan that cut across the ramps.
- From the ramp plan the positions of the ramp flights and landings are determined.
- With considering the ramp standards, total rise is found and total rise is given in the section
- On two edges of the ramps, protection edge is drawn which should be minimum 5cm
- At 76-86 cm above the ramp, balustrade is drawn
- Flooring materials are shown with hatching according to its material.
- Landing and floor levels are given.
DOORS
DRAWING A DOOR PLAN
- Door opening is given on the wall plan.
- Plaster, paint or any other cladding is drawn.
- Door frame is drawn
- Door is drawn.
- Door opening line is drawn.
- Door dimension is given
Door Plan in different scales

DRAWING A DOOR SECTION
- Door opening is given on section.
- Plaster, paint or any other cladding is drawn on the wall.
- Door frame is given.
- Thickness of the door and door frame is given.
- Materials are shown with hatching.
- Door level is given.
Door Plan in different scales – 2

Hinged Door Elevation

Hinged Door Plan

Sliding Door Elevation

Sliding Door Plan
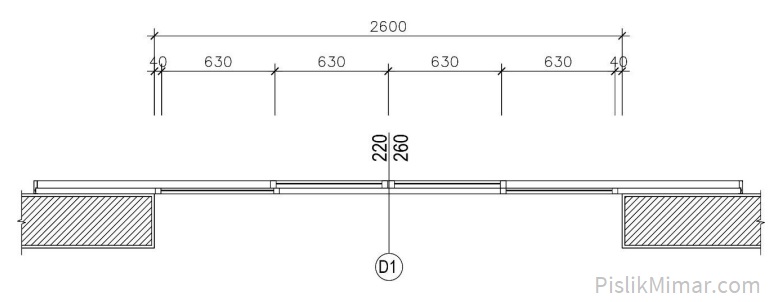
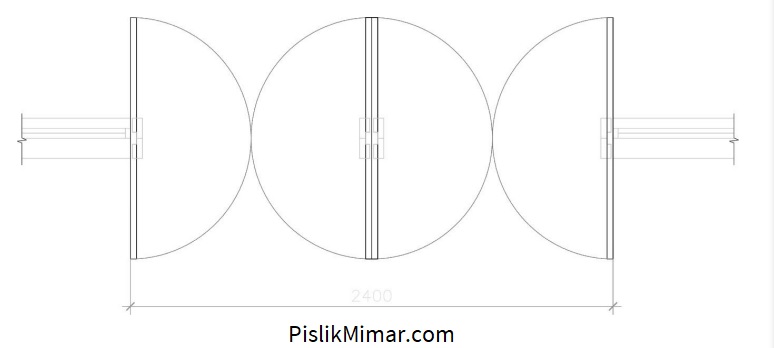
Bifold Door Elevation
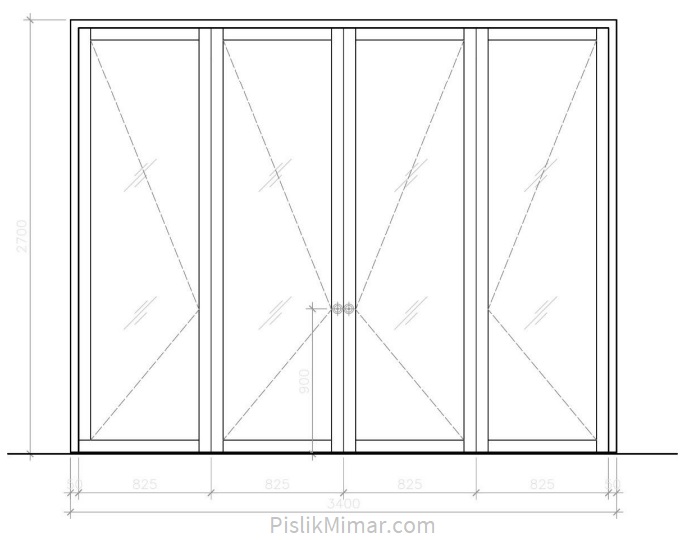
Bifold Door Plan

Revolving Door Elevation

Revolving Door Plan
WINDOWS
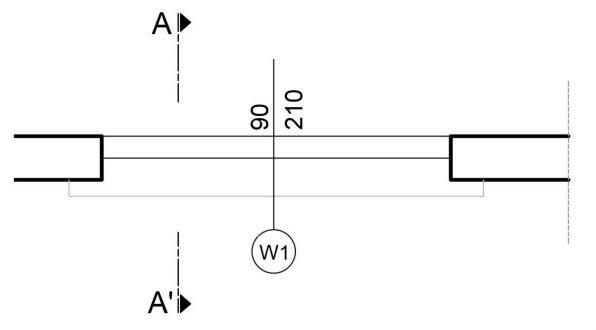
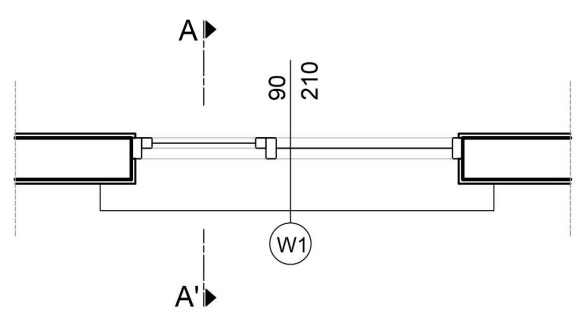
DRAWING A WINDOW PLAN
- Window opening is given on the wall plan.
- Plaster, paint and any other cladding is shown on the wall.
- Window frame is given.
- Mullions are given.
- Window casements are drawn.
- Glazing is drawn.
- Sill is drawn.
- Materials in section view is given by hatching.
- Window levels are given.
Fixed Window Plan
DRAWING A WINDOW SECTION
- Window opening is given in section view.
- Plaster, paint or any other cladding is drawn on the wall.
- Window frame is drawn.
- Window rails are grawn.
- Window casements are drawn.
- Glazing is drawn.
- Sill is drawn.
- Materials in section view is given by hatching.
- Window levels are given.
Fixed Window Elevation

Fixed Window Elevation
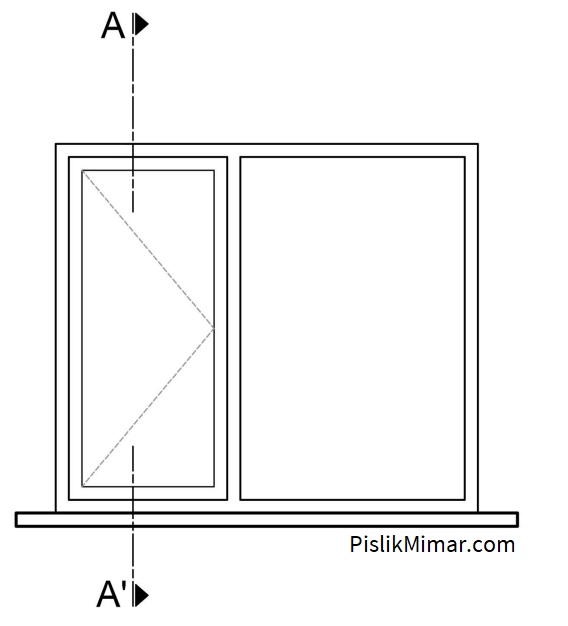
Sliding Window Plan
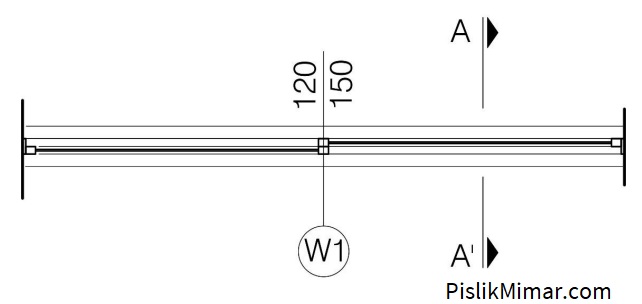
Sliding Window Elevation

Awning Window


